Set your signature in OWA
Ever get tired of adding a signature block to an email? Typing your name and other info every time you write an email? Here is how to get rid of that tedium with Outlook for the web.
Your email signature tells people a lot of about you. For example:
- Who you are
- Your company and role (if applicable)
- Contact info (email address, phone number, etc)
- Maybe a web site URL
Typing all this information for each email can be a time suck. So why not use the built-in features of your mail client?
For this example, I'll explain how to create an email signature with Outlook for the Web (outlook.com), which equally applies to personal and business users. Your provider or mail client might be slightly different, but the concept and steps should be very similar.
- Click the gear icon in the upper right corner of the page. A new pane will fly out from the right side.

- At the bottom of the pane, click View all Outlook settings.
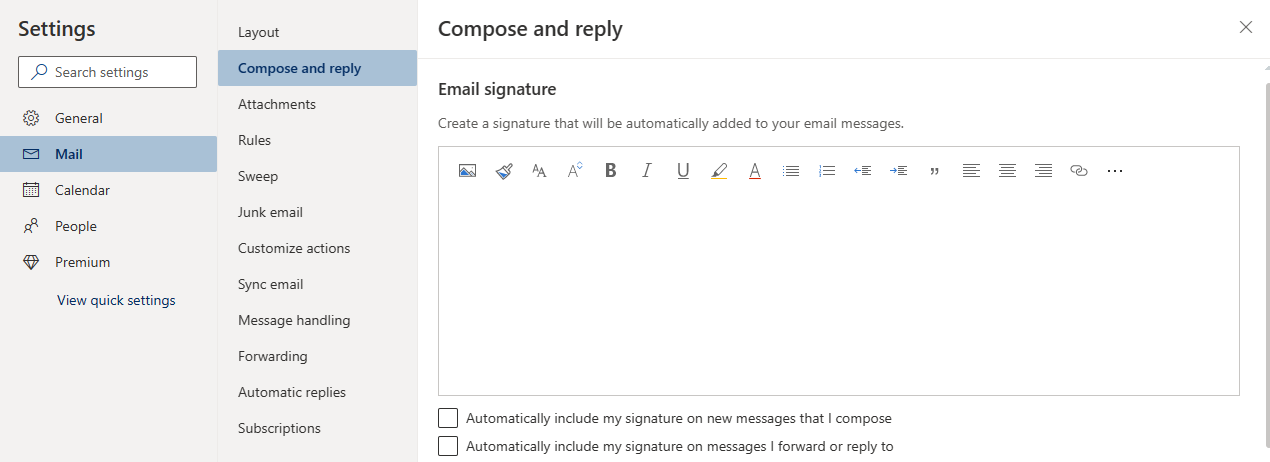
- Select the Compose and Reply entry in the middle column.
- Enter the signature that you would like use in the text editor.
- If you want the signature to be automatically applied to all new messages, check the box labeled Automatically include my signature on new messages that I compose.
- If you want the signature to be automatically applied to messages that you reply to or forward, check the box labeled Automatically include my signature on messages I forward or reply to.
About this post
Posted: 2021-07-15
By: dwirch
Viewed: 346 times
Categories
Tip
Tutorials
Email
MS Outlook
Attachments
Loading Comments ...
Comments
No comments have been added for this post.
You must be logged in to make a comment.